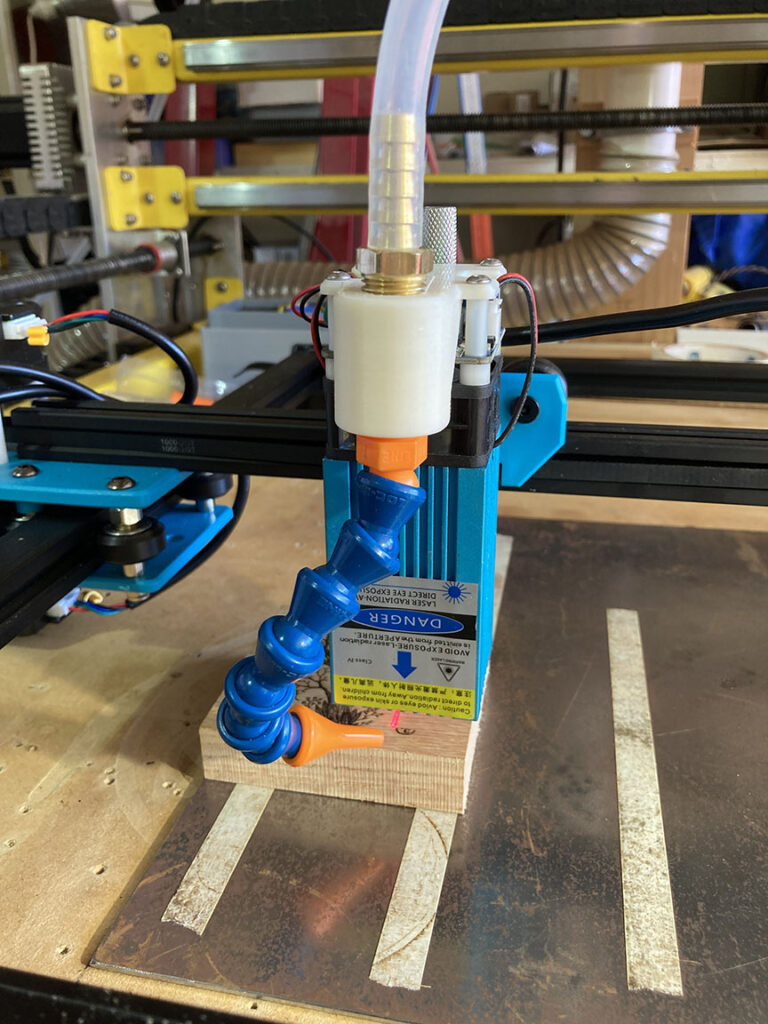
Today I will experiment with air assist with the laser engraver. The process is very similar to mist cooling with metal cut milling operations and also similar to chip clearing with my overheard CNC wood router and with my wax milling on my Taig.
This is not my first experience with air assist. This time it is used to clear the smoke rapidly out of the LASER beam path and secondarily create a cleaner burn.
From what I gather from other LASER user systems is it is not a high pressure air blast to move away chips as in my other systems. Small air compressors such as aquarium air pumps are recommended as air sources.
The laser burn creates smoke which contains condensable volatiles. These are organic sticky resins that condense and gather on close by surfaces of the target item and also the LASER system optics. Not a good thing on the optics.
I have taken to washing the engraving after the burn and then inspecting and cleaning the LASER optics. Yes, the optics do get a coating of tar-like smoke deposits.
I see two benefits from air assist. A cleaner burn path on the target material and less deposits on the LASER optics. A nice side effect is the effective power of the LASER seems to be nearly double that of using no air assist.
The reason must be there in no longer dense smoke obscuring the LASER beam. I see NO SMOKE when using the air assist. There is still an odor of smoke but far less.
The engraving is absolutely beautiful in my opinion. Clean and crisp and deep. I will be doing single pass where I used two passes previously. Yes, it is that good.
My air assist is here to stay.
The Hardware
I designed the white plastic part in FUSION 360 and 3D printed it using ASA plastic. Stronger than ABS and UV resistant. It replaces the top cover on the LASER body using the original screws.
The orange and blue flex nozzle is a standard 1/4” Loc-Line 40413 Coolant Hose Assembly Kit. The hose is 1/4″ ID x 3/8″ OD Silicone Tubing, about 10 foot long. The oilless air compressor is one I bought from Grainger over 15 years ago.
This is not a “how-to” article but should give a good idea of how it was done.
I have posted a video on YouTube that gives a few more details.


